JavaFX+NetBeans+Gradle
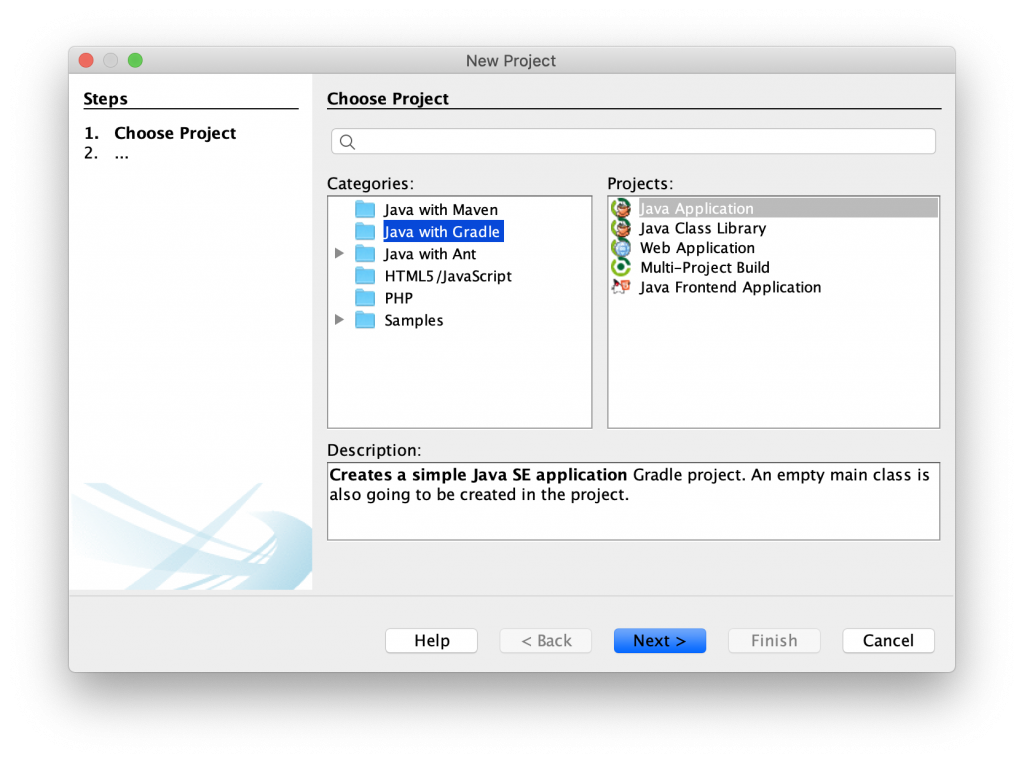
「New Project」から「Java with Gradle」ー「Java Application」でプロジェクトを作成。
build.gradleに「org.openjfx.javafxplugin」追加、「javafx」を宣言。
後は淡々JavaFXのコードを書くだけ。
他に設定等は不要です。
Project
build.gradle
plugins {
  id 'application'
  id 'org.openjfx.javafxplugin' version '0.0.8'
  id 'java'
}

javafx {
    version = "11"
    modules = [ 'javafx.controls', 'javafx.fxml' ]
}

repositories {
    jcenter()
}

dependencies {
    testCompile 'junit:junit:4.12'
}

mainClassName = 'ExampleJavaFX.HelloFX'
HelloFX.java
package ExampleJavaFX;

import javafx.application.Application;
import javafx.fxml.FXMLLoader;
import javafx.scene.Scene;
import javafx.scene.layout.HBox;
import javafx.stage.Stage;

public class HelloFX extends Application {

    @Override
    public void start(Stage stage) {
        try {
            stage.setTitle("FxmlSmpl");
            FXMLLoader fxml = new FXMLLoader(getClass().getResource("/fxmlSmpl.fxml"));
            System.out.println(getClass().getResource("/fxmlSmpl.fxml").getPath());

            HBox root = fxml.load();
            Scene scene = new Scene(root);
            stage.setScene(scene);
            stage.show();
        }
        catch(Exception e) {
            System.out.println(e);
            e.printStackTrace();
        }
    }

    public static void main(String[] args) {
        launch();
    }

}
fxmlSmpl.fxml
<?xml version="1.0" encoding="UTF-8" ?>
<?import javafx.scene.control.* ?>
<?import javafx.scene.layout.* ?>

<HBox>
    <children>
        <Label text="ラベル" prefWidth="80.0" />
    </children>
</HBox>


